Google Analytics is a necessity for your blog. There’s no way around it. It shows you how much traffic you get, where your traffic is coming from, the most popular content on your blog and a ton of other helpful information that you need as a blogger. By now most bloggers know that they should have Google Analytics installed, but the problem is they don’t know how to add it into WordPress.
Adding Google Analytics to WordPress is actually very easy, and there’s a couple of ways to do it. Here’s the two easiest ways to add Google Analytics to your blog if you use WordPress.
Method 1: Manually Placing The Google Analytics Tracking Code
The first technique is the “traditional” way, and the way that Google Analytics actually tells you to do it.
After your account is setup, go to Admin > Tracking Info > Tracking Code. Copy the code you see there:
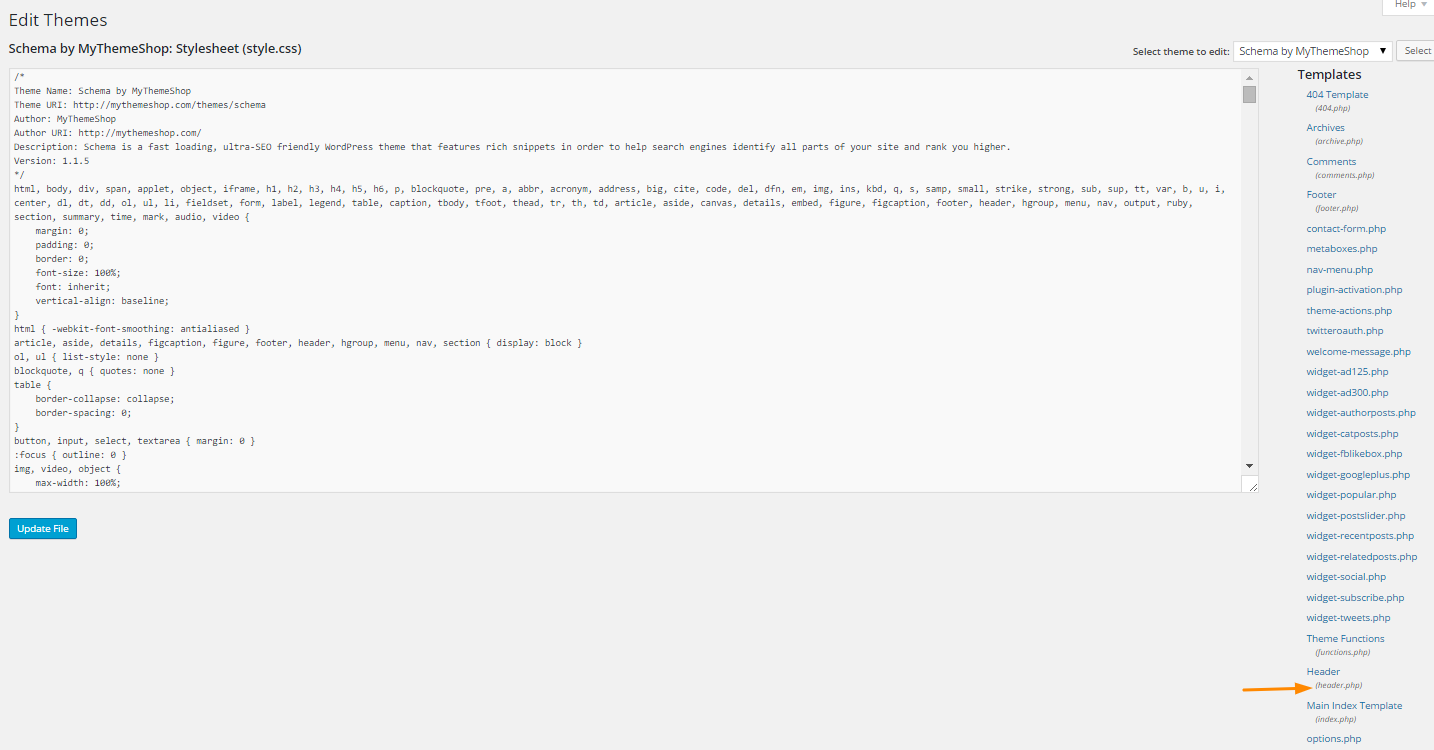
Then login to WordPress and go to Appearance > Editor. On the right hand side, you’ll see a list of templates. Find the header.php file and click on it.
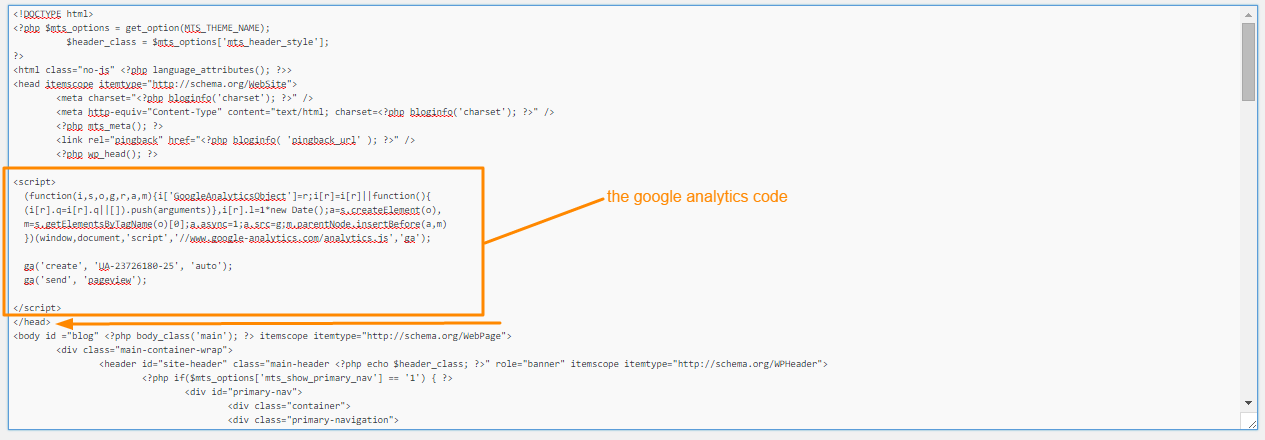
Look for the </head> tag (do Ctrl+f and search for </head>). Right above that, paste in the code you got from Google Analytics. Then click on Update file.
That’s it. The header.php file appears on every page of your site, so it’ll track the stats from all of your pages.
Method 2: Using A Google Analytics WordPress Plugin
This is the method I use for my blogs because it’s quick and super simple. In google Analytics, go to Admin > Tracking Info > Tracking Code. Copy the tracking ID.
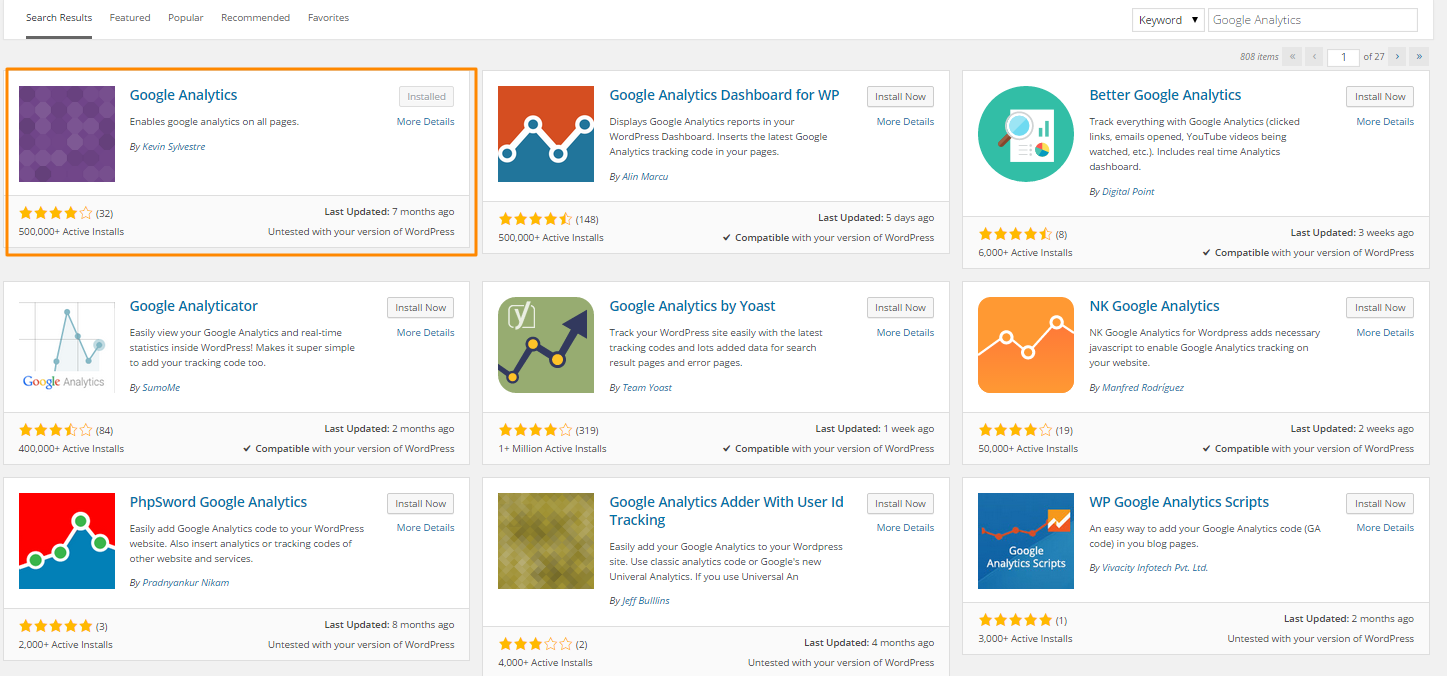
Then in WordPress, go to Plugins > Add New and do a search for “Google Analytics”. You’ll see a ton of results, but this is the plugin I use and recommend. It’s lightweight and and barely takes up any space.
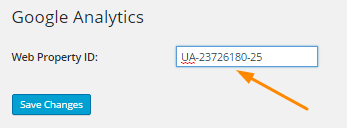
After you install it, go to settings > google analytics. Paste your tracking ID you copied and click save changes.
And you’re done!
Like I said, I prefer method 2 because you don’t have to edit any of your WordPress theme’s files and it’s simple. But if you prefer the first method go for it. The most important thing is that you have Google Analytics installed on your site correctly so that you can start tracking your traffic.
If you’re new to Google Analytics or you just don’t use it very much, check out my Google Analytics for Bloggers guide. It’ll show you everything you need to know to get started with Google Analytics. Have any questions? Feel free to leave a comment or send me an email!


