At the bottom of all of my posts, you’ll see a nice looking box to enter your name and email address. You might’ve been greeted by a pop-up box asking you to subscribe to my newsletter. Or on certain pages, you’ll see a box on my sidebar to join my list. All of these little boxes let me gather email addresses so I can deliver awesomeness to you all even when I’m not writing a full post on my blog. Creating an email subscriber list is one of the first things you should do as a blogger, even when you have absolutely zero traffic. But where do you start?
A lot of bloggers will tell you that should start building an email list, or even tell you how to grow one. But let’s not skip over the most important part, which is setting everything up. I decided to put together this nice and handy little guide that will take you step-by-step through the process of setting up your blog’s first newsletter/email opt-in (with pics!), and even give you some tips on how to start getting people to subscribe!
In this post, you’re going to learn:
- Why your blog absolutely needs an email list
- How to setup email lists with MailChimp
- How to add email subscribe boxes on your WordPress blog that actually look good
- How to setup autoresponder messages (don’t worry, I’ll explain what autoresponders are too!)
- How to start getting your first email subscribers
We’ve got a lot of ground to cover, so let’s jump right in and get started.
Try following along with these steps while you’re reading it, so by the time you get to the end your newsletter will be all setup and ready to go!
[Tweet “The complete guide to setting up @mailchimp on #wordpress!”]
Why Your Blog Needs An Email List
Let’s talk cold, hard numbers. Somewhere between 70-96% of people who exit your blog won’t ever come back. It’s your job to give people a reason to return to your blog. That’s where a newsletter comes in handy. If you’re able to get visitors to give you their email address, you have a way to keep in touch.
It’s like meeting someone you’re attracted to during a night out. Imagine if you have a great night together, and then when it’s time to go home, they just say “bye”. You didn’t get their phone number, Instagram, or any other way to get back in touch with them. Unless your life is like a romantic comedy movie, your chances of meeting back up with that person are slim. But, if you have their phone number, you can text them in a few days to stay in their mind and keep in touch with them.
The thing about email addresses is that they’re pretty private and personal. And outside of someone giving you their phone number, it’s about as direct of a way to get in touch with people as you can get. When someone follows you on Twitter, your tweets can easily get lost in the pool of thousands of other people they’re following. And even Facebook isn’t as personal or direct as email.
Another great thing about email is that people have to do something with your message when they see it in their inbox. Especially these days when everyone’s trying to do the whole inbox zero thing and pushing for productivity. They’re most likely going to see your emails at some point, and if you’re sending the right kind of emails, there’s a good chance they’ll open it up to see what you’re talking about.
If for some strange reason you need even more convincing about setting up an email list, check out rookie blogging mistake #4 in this post. But basically, if you want to be able to keep in touch with the people that are coming to your blog, you need to start collecting their email addresses. Otherwise you’re losing out on traffic, income, and followers.
Why MailChimp?
I’ve used both MailChimp and Aweber to setup email lists, and I like them both. But the reason this guide is about MailChimp is because:
- It’s what I’m currently using for this site
- It’s super simple to use
- It integrates easily with WordPress
- If you have less than 2,000 subscribers it’s completely free to use
You don’t have to sit around trying to decide whether or not it’s “worth” setting up a newsletter since MailChimp is free to use in the beginning. And once you get over the 2,000 subscriber mark, their pricing is still really affordable.
On top of just the financial part, MailChimp has some nice features like using your blog’s RSS feed to send emails, which makes it really easy to automatically have your newest blog posts sent out to your list. It also integrates with Google Analytics so you can see what percentage of your traffic is coming from email marketing.
You can check out the full list of features here.
How To Create Your First List In MailChimp
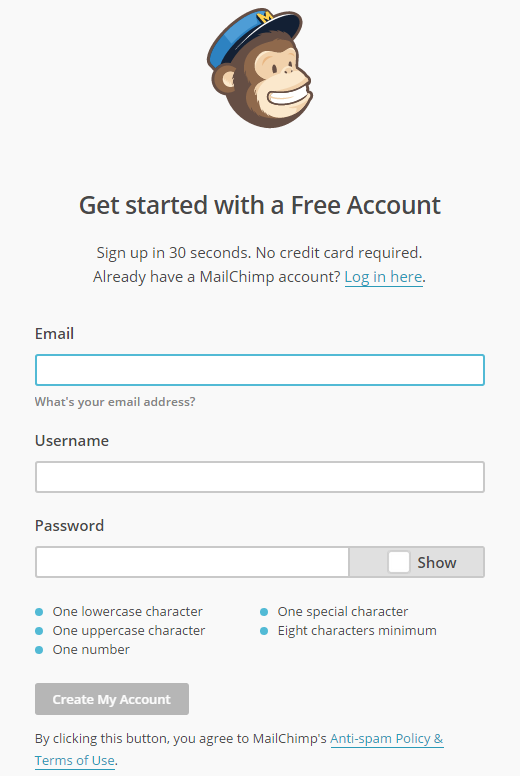
The very first thing you’ll need to do is signup for your free MailChimp account.
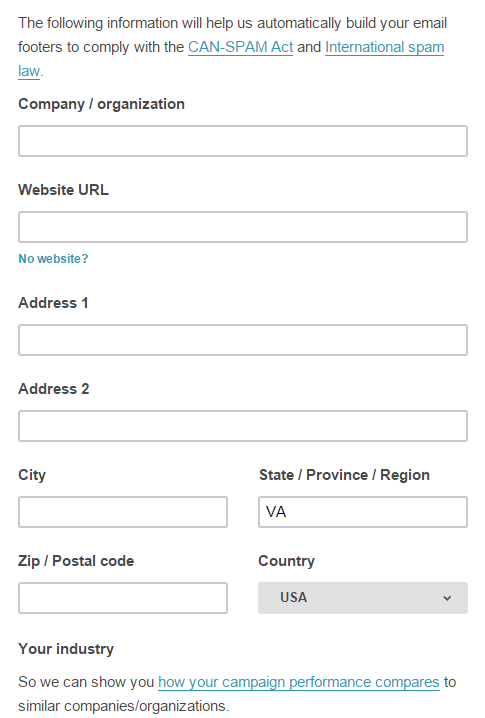
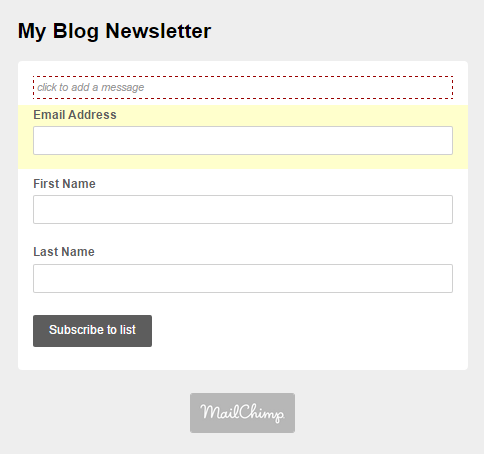
One thing that a lot of bloggers have questions about is this part. Where it asks for an address and other information in order to comply with the CAN-SPAM Act.
Should you put your home address? You can, but just be aware that the address is going to show up in the bottom of the emails you send. I personally use a PO Box address. They’re super cheap and it gives you some privacy.
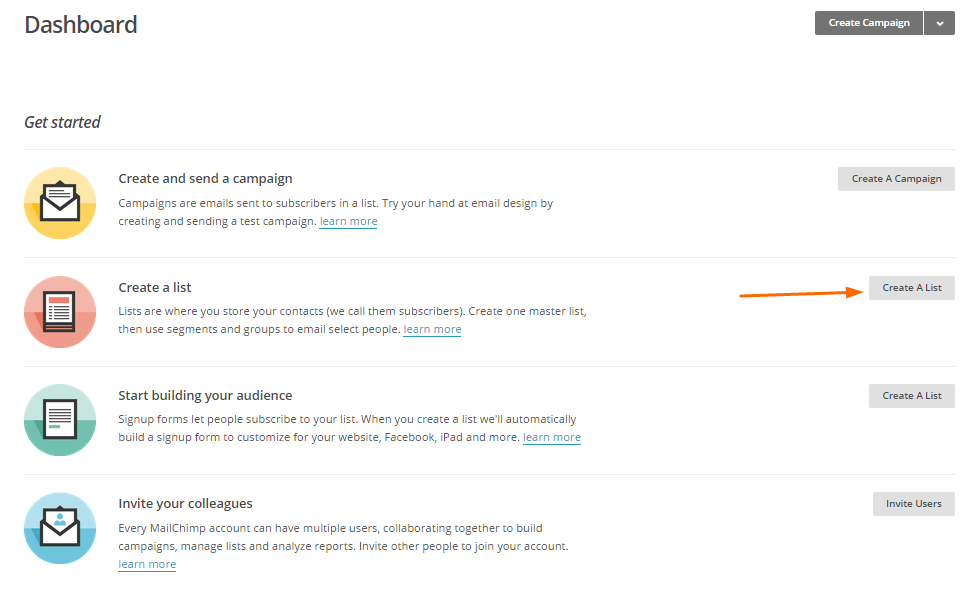
Once you’re all signed up, it’s going to take you to the Dashboard. From there, you need to click on “Create A List”.
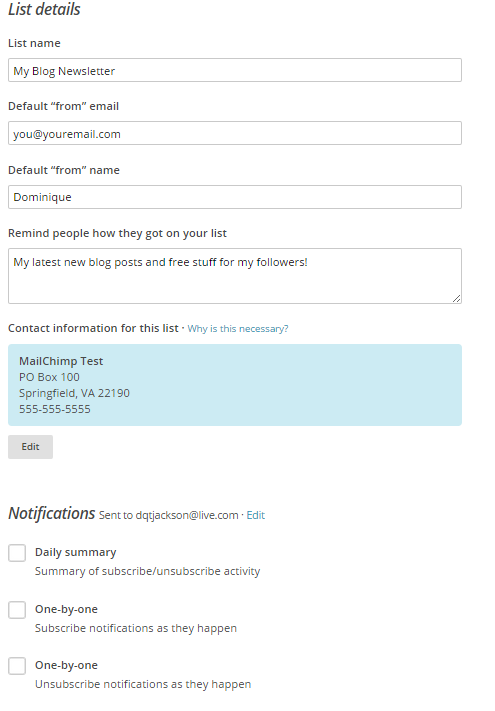
Then it’ll take you to a screen to fill out some basic info about your list. A piece of advice on this section; don’t turn on email notifications for yourself. You don’t really need to receive an email every time someone new subscribes or unsubscribes. Just use the MailChimp app for your phone, or maybe get the daily summary. Just don’t do the one-by-one notifications, it gets annoying real quick.
Nice! You created your list, but it looks emptier than the gym in October. So now it’s time to setup your autoresponder and welcome messages, and get an email opt-in form on your site.
How To Add Email Subscribe Boxes To WordPress
You have a couple of different options you can use to add email subscribe boxes to your blog:
- Use MailChimp’s built-in code/opt-in forms
- Use a separate WP plugin that integrates with MailChimp
I have to be honest here. I love MailChimp, but their default opt-in boxes aren’t the best looking. If you know some coding, you can customize them to make them look more enticing and appealing though.
Instead, I prefer to use a separate WP plugin. The one I use and recommend is WP Subscribe Pro from MyThemeShop (use coupon code Dominique to get 50% off!). The forms look clean, and it’s really easy to setup. MTS will give you complete instructions on how to download the plugin and upload it to WordPress, so I won’t get into that here. But once you have it installed, here’s how to set it up with the MailChimp list you just created.
The first thing you have to decide is where you want your opt-in boxes to show up. You can have it as a pop-up box, in your sidebar, at the beginning/end of your blog posts, or within the posts/pages using shortcodes. I recommend having email opt-in boxes in the sidebar, at the end of blog posts, and as a pop-up like I have on my blog. Wherever you choose to put your forms, the process is the same.
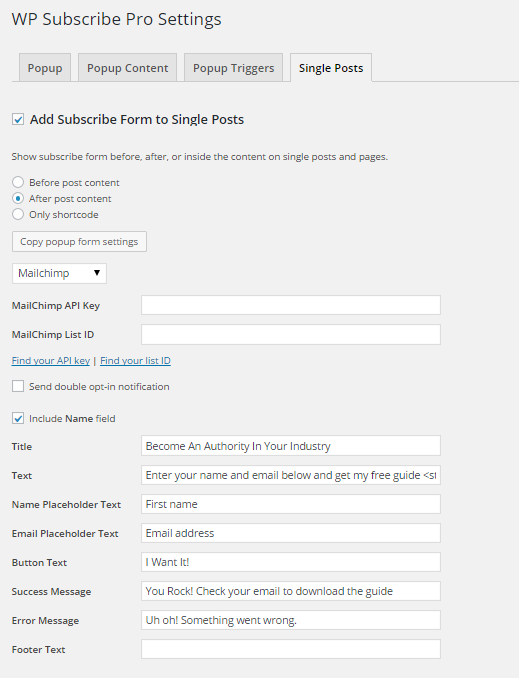
From the WP Dashboard>Settings>WP Subscribe Pro, click on either the Pop-Up Content or Single Post tab. Choose “MailChimp” from the drop-down menu. In order to integrate your MailChimp list into the WP Subscribe Pro plugin, you need two things:
- MailChimp API Key
- MailChimp List ID
Here’s how to get your MailChimp API Key, and here’ how to get your MailChimp List ID. Just copy and paste each one, and now anyone that enters their email address into your forms will be added to the MailChimp list we setup in the beginning!
Then fill out the messaging you want your subscribe boxes to have, and choose your colors. I highly suggest including a name field, and just ask for the first name. MailChimp will let you personalize your emails with subscriber names so instead of “Hey”, you can put “Hey Sarah”. It’ll increase your open rate to have the person’s name in the subject line, and it makes your emails a lot more personalized.
And ideally, you’ll be giving something away in order to get people to subscribe to your email list, so that’s what you’d put in the Title and Text sections. But I’ll go more into that later. Boom! Done.
You have your list created, and your email subscribe forms are on your site. The last part of the puzzle is setting up the actual emails that people are going to get when they sign up.
How To Setup A Welcome Message And Autoresponders in MailChimp
First, I want to quickly explain what an autoresponder is exactly. Have you ever entered your email to get a coupon for a store or to sign up for a free eBook or something? Or hopefully you’ve at least subscribed to my email list….. Well, that first email you get that has your coupon or free eBook is an autoresponder. It’s a message that’s been setup to be sent automatically when you sign up to an email list.
Autoresponders make it so that you don’t have to manually send out emails to each subscriber that joins your list. You just set everything up and let it run. Autoresponders are only sent when specific actions happen. For instance, you might setup a series of autoresponders to go out in a sequence. You send message #1, and then setup message #2 to be sent only after the subscriber has opened message #1. Or you can set it up to send X number of days after a subscriber joins your list. There’s a lot of possibilities, but that goes beyond the scope of this guide. Just wanted to give you an idea of what an autoresponder is, so the rest of this guide will make sense to you.
Here’s how a standard email signup process works:
- Bob enters email to opt-in box
- Bob receives an email asking to confirm his subscription (this is called a double opt-in)
- After Bob confirms his subscription, he’s taken to a “thank you” page
- Optional – Bob receives a final welcome email
Now let’s walk through the process of setting this up.
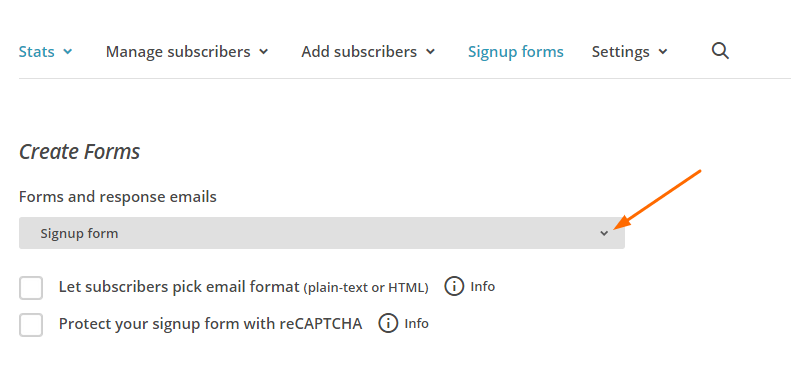
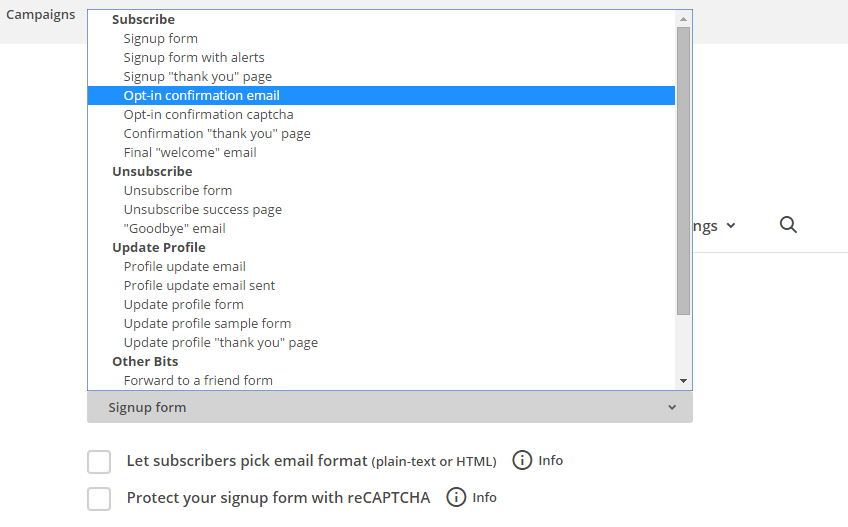
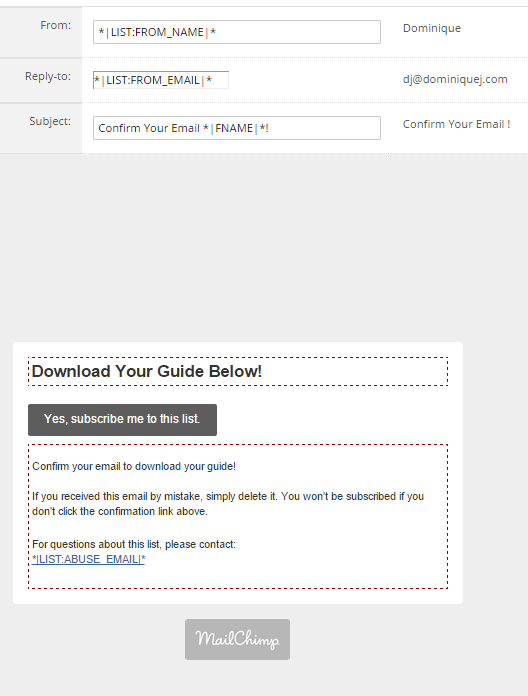
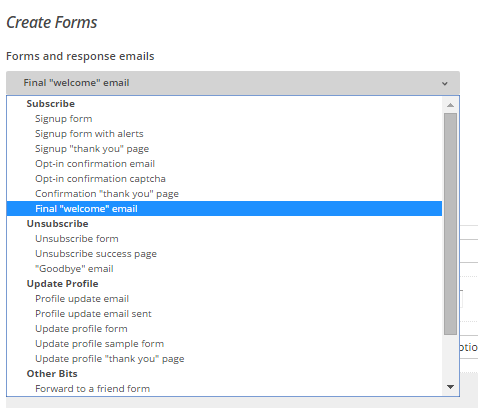
Back in MailChimp, you’re going to go to List>The list you just made>Signup Forms>General Forms. Then click on the drop-down button to choose the opt-in confirmation email. This is the email that a person gets immediately after filling in the subscribe box. It’s basically a way of saying “hey, you signed up to get emails from me right?” Technically double opt-ins are optional, but it helps keep your number of unsubscribers down because the person is confirming that they actually meant to sign up for your list.
The message that you put on your opt-in confirmation email will depend on what you offered to originally get them to sign up. Here’s what mines looks like. You can also see what it looks like by SUBSCRIBING TO MY LIST!! 🙂
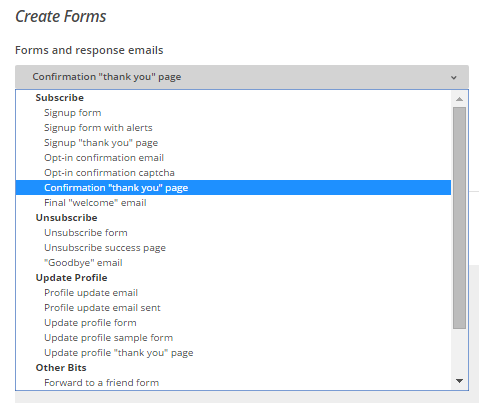
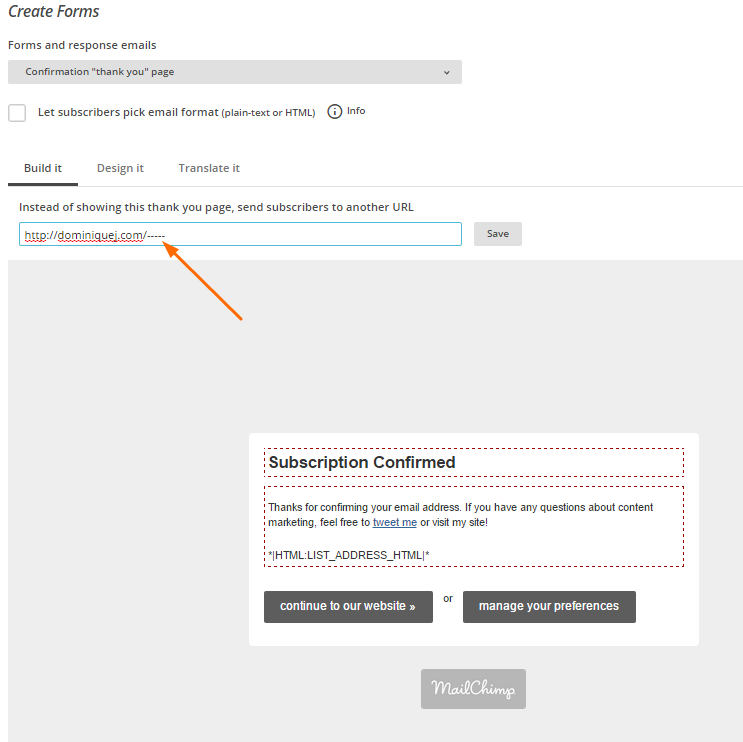
After you fill that part out, click on the drop-down menu to change forms again, and choose “confirmation thank you page”. The confirmation thank you page is where people go after they click on the “Yes, subscribe me to this list” button in the pic above.
For this page, you have two options. You can use MailChimp’s template page and just change the info, or you can setup a page on your own site, and your visitors will go there, which is what I do for my list. If you’re giving away something like a free eBook download or a coupon, your confirmation thank you page should be the page where people can get whatever it is you’re giving away. In my case, it’s an eBook, so that’s the page I setup.
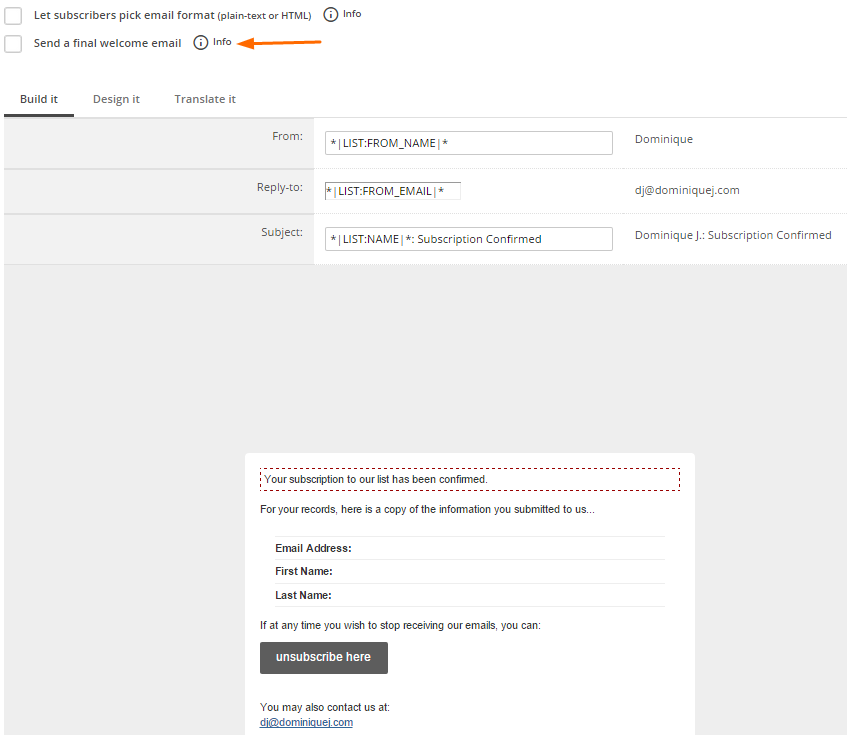
The last step is completely optional, which is to setup a “final welcome email”. Some bloggers do it, others don’t. I don’t send them because by this point, your subscriber has already gotten two emails from you. Three might be a bit too much. Instead, I’d suggest setting up an autoresponder to go out a day or two after they sign up. But in case you want to use the final welcome email, you just have to select it from the forms drop-down menu.
Here’s what MailChimp’s default final welcome email looks like. Keep in mind that you have to check the box if you want to send this last welcome email, otherwise it won’t get sent out.
That’s it! You’re all set to go. If you want to go a step further and get an autoresponder series going, you can do that in the Automation part of MailChimp. But I’ll cover that in a different post.
Here’s where we’re at right now. You have your list set up, your opt-in boxes are on your blog, and the emails that people are going to get are set up and ready to be sent out automatically. But how will you get people to want to give you their email address?
How To Get Your First Email Subscribers
I could write an entire post about getting new email subscribers, because it’s such an in depth topic. But I’ll just go over the basic parts here.
First and foremost, you have to give people a reason to join your email list. “Subscribe to get my latest blog posts” just doesn’t cut it anymore. Tell people what they’re going to get out of joining your email list. Whether you’re giving away a free guide, a discount code, a workshop, or a free consultation, you have to give your audience some type of value to make it worth their while.
If you’re in the process of putting together a free gift to give away, you can do something like what I have on the sidebar of my home page. Notice how I’m not giving away a book or anything downloadable. I’m telling you that if you subscribe to my email list, I’ll show you how to become a content pro. The value I’m giving away there is my knowledge. And then I added some exclusivity by mentioning that I give tips that are only available to my subscribers. Exclusivity is an awesome way to intrigue people, I learned that from Syrup!
My suggestion is to create some type of a free guide though. Guides are great because they’re not super difficult to make. I made my 10 steps to authority guide using Canva, which is completely free. But you can even use something as simple as Word or Google Docs, write up a guide and save it as a PDF, then upload it to your site. Then just put the link to download your guide on the Confirmation Thank You page we set up earlier. It’s that simple.
In case you need some ideas for what kind of free opt-in offer to make, here’s some suggestions:
A 101 guide for your niche that goes over the basics for someone getting started (ex. Healthy Cooking 101, Desk Restoration 101..)
A round-up guide of tips from leaders in your industry ( ex. My SlideShare presentation on improving your blog)
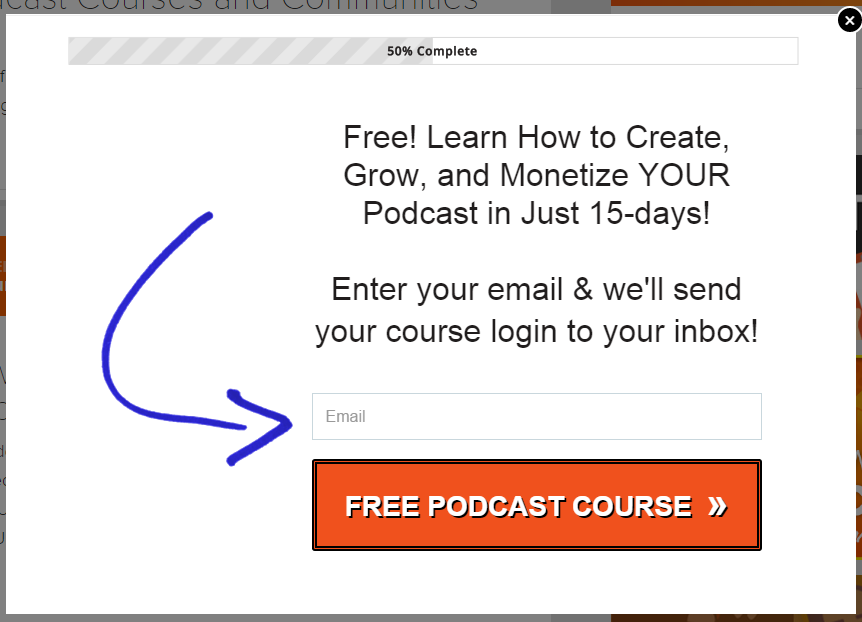
A free course that shows people how to do something within your industry (ex. Entrepreneur on Fire’s podcasting course)
There are so many possibilities. A lot of it depends on your industry and niche. Make sure that whatever you’re giving away is something that your target audience can’t resist.
Once you have your free opt-in offer created and uploaded to your site, the next step is going to be to promote it. Here’s what I suggest. Guest blogging. Start guest blogging to get your name out there, and to push some traffic to your blog.
But here’s what you’re going to do. Make sure that you have the pop-up email subscribe box setup with WP Subscribe Pro. In all of your guest posts, you’ll most likely have a link back to your blog within the post or in the byline. Whenever people click through to your blog from the guest post, WHAM!! Your email subscribe box is going to be the first thing they see. With just one guest post, I was able to get the ball rolling on my email list!
To break it down quickly:
- Create your free email opt-in offer
- Setup a pop-up email subscribe box with WP Subscribe Pro
- Guest post to push traffic to your blog
- #WINNING!
Start Building Your List!
You have everything you need to set up your email list, put that bad boy on your blog, and start getting email subscribers. My question to you is will you take action? I purposely chose tools and resources that are quick and easy to use so that you don’t have any excuses not to get started. Before you do anything else with your blog, setup your email list. Every day that you let go by without having an email opt-in form on your site, you’re letting people leave your site and never return.
Have any questions about setting up an email list on your blog? Let me know in the comments and I’ll be glad to help you out. Or, you can always Tweet me or email me. I’m easy to get in touch with!
Thank you for this information! It helped me out so much!
Glad it helped you Neena!
This information is GOLD!! Thank you sooo much!!!
No problem Jenny.
This guide is great! I finished all the steps and can’t wait for my first subscriber.
Thanks, I’m sure you’ll build your list up in no time!