
Google Authorship allows you to connect your Google+ profile to any content that you publish on your website, or any sites you guest blog on. There are a few different benefits of adding Google authorship to your content:
- Your posts stand out more in search results
- You finally get credit for the content you post on different sites
- Helps you build authority in your industry/niche
- Some people believe it helps SEO (there’s no data to support this yet though)
Long story short, whether you’re a business owner, blogger, or a freelance writer, you should integrate Google Authorship into your website, and any sites you publish content on.
I made this post to give you a VERY simple and quick way to add Google authorship to your site because I noticed most of the guides out there are overly-complicated, and ask you to do 10 different things. You don’t have to install any WordPress plugins to add authorship. You don’t even need to add an email address from your site. Just follow these easy 3 steps to get authorship on your site.
1: Link your site to your Google+ profile
In your Google+ profile, add a link to your website under the Links>Contributor to section.

Step 2: Add authorship link to your website’s header
This step involves some simple coding. Don’t worry if you’re not too technical, I’m not either. This is very easy, especially if you’re using WordPress. In your WordPress dashboard, go to Appearance>Editor. On the right hand side, find your header.php file, and open it up. Look for the ending head tag, which looks like this, < / head >. Right before that tag, place in the following piece of code:
<link rel=”author” href=”https://plus.google.com/+DominiqueJackson1/posts” />
Just replace my Google+ URL with yours. Don’t forget to save your changes. Here’what the final version should look like:

Step 3: Verify your authorship
You can easily check to make sure that you did everything right with Google’s Structured Data Testing Tool. Just put in your site’s URL, and your results should look something like this:
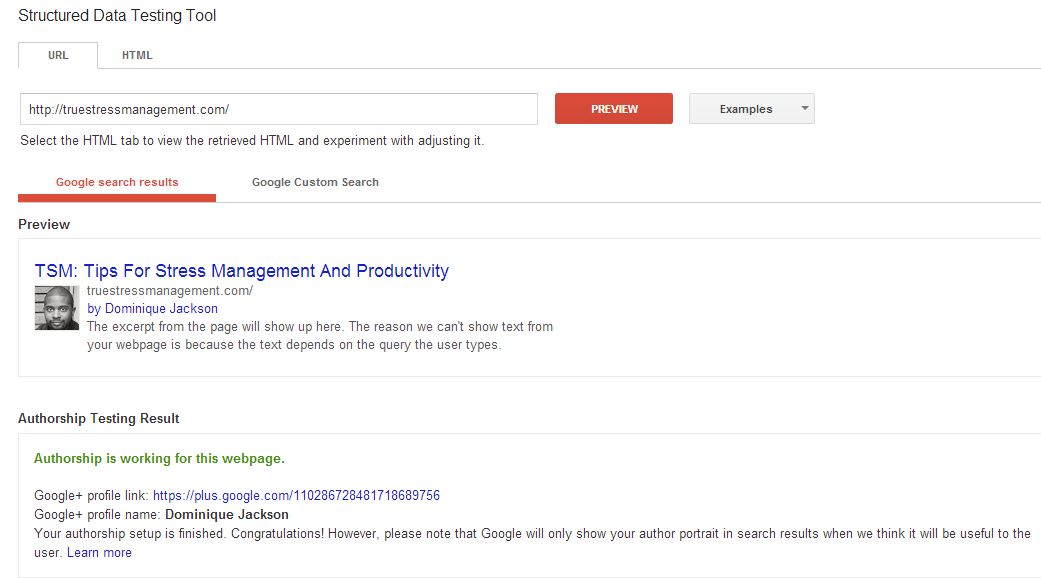
And that’s all it takes. Easy right? If your profile doesn’t show up when you do the testing, Google will give you some idea of what went wrong. Check to make sure you entered your Google+ URL correctly, and that you put a link to your site in your Google+ profile. If you followed the steps here, it should work fine. This is the easiest method I’ve found to add Google authorship to my sites. It’s quick and the results are immediate.
If you want to add authorship to a site that you don’t own (for guest posts), just follow step one, and then add a link to your google+ profile in your byline or “about author” section of your guest post using this url structure: <a href=”[profile_url]?rel=author”>Google</a>. Just replace the “profile_url” with a link to your profile, without the [] brackets. Here are the step by step instructions from Google.
Take a few mintutes today to set authorship up on your site, it’s definitely worth it. And here’s a cool infogrpahic I found that gives some more info about Google authorship:
![]()


